Friday, September 30, 2011

Butter Seared Scallops with Quinoa and Fresh Vegetables


Now, if you haven’t already noticed, I tend to bake. A LOT. I am a neurotic, sporadic, obsessive baker, one that will try the same recipe three times in one day until I’m satisfied (or too exhausted to try again) with the results. Because of this, sweet pastries and cakes have taken over the majority of my blog, and I find that only a desperate few, shall we say real food recipes have been able to debut on my blog. Don’t get me wrong, I love cooking, but my heart will always be in baking.

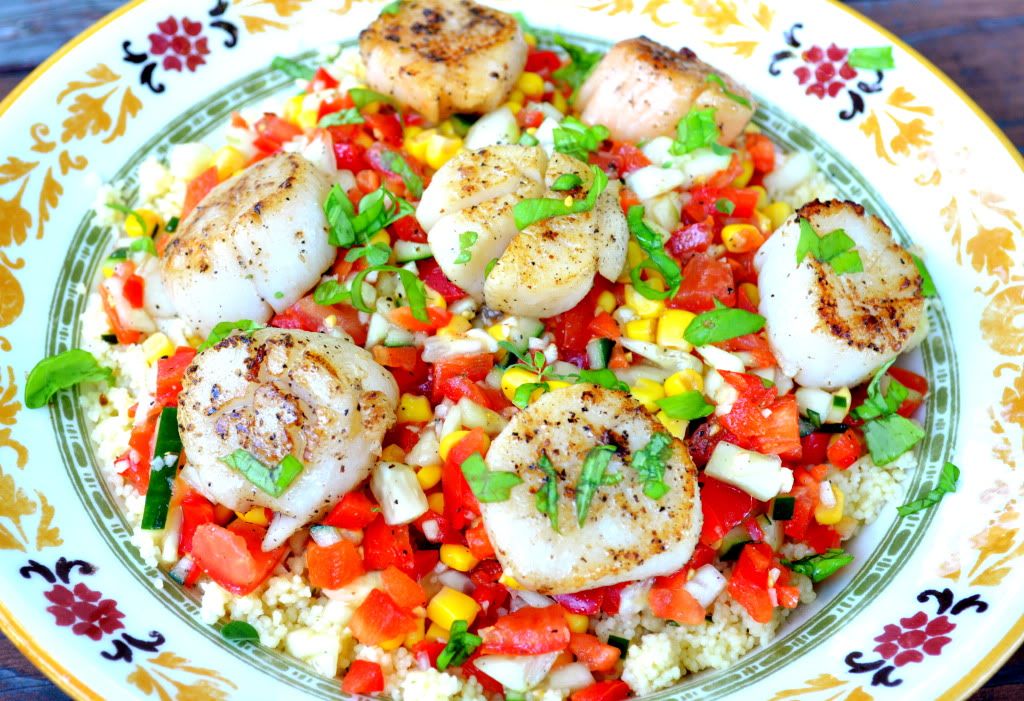
Every once in a while, though, I find a non-dessert food recipe that catches my eye. I’m not sure what it is, whether the bright colors or beautiful blog pictures, but it causes me to feel as if it would be a crime not to try. I stumbled upon the site: Pip and Ebby, and was immediately taken by Ebby’s striking photography and mouthwatering recipes. One in particular drew me in, her Grilled Scallops with Quinoa and Fresh Veggies.
I’ve never had much experience with quinoa, in my ignorance assuming nothing could compare to Asian rice (I’m half Japanese; rice is basically in my blood), and was a bit skeptical in trying to cook it. However, the flavor and texture worked wonderfully, and I especially (and rather embarrassingly) enjoyed the “fluffing up” of the quinoa after it had absorbed the water.

After starting to cook, I realized that the vegetables in the recipe were raw. I was slightly surprised, assuming that everyone cooked their vegetables prior to adding them into a main course, however, the burst of freshness from each bite added flavors and textures that would have been non-existent if cooked.

Ingredients
Butter Seared Scallops with Quinoa and Fresh Vegetables
Slightly Modified from Pip and Ebby

8-10 fresh sea scallops
2 tbsp butter
2 large tomatoes, roughly diced
1 red bell pepper (green/yellow), roughly diced
1 large cucumber, skin peeled off and roughly diced
1 1/2 cup corn kernels
3 cloves garlic, minced
1 lime
2 tbsp extra virgin olive oil
red pepper flakes, to to taste
salt and pepper, to taste

Butter Seared Scallops with Quinoa and Fresh Vegetables
Soak the sea scallops in 2 tbsp melted butter for 20-30 minutes.

While soaking, prepare the quinoa according to package and, when finished, enjoy fluffing it to its full potential with a fork.

In a medium-large bowl, add the tomatoes, red bell pepper, cucumber, corn, garlic, juice from the lime, olive oil, red pepper flakes, and salt and pepper to taste. (This will be delicious by itself! Try to practice self control and refrain from eating half of it. That would be absurd...)

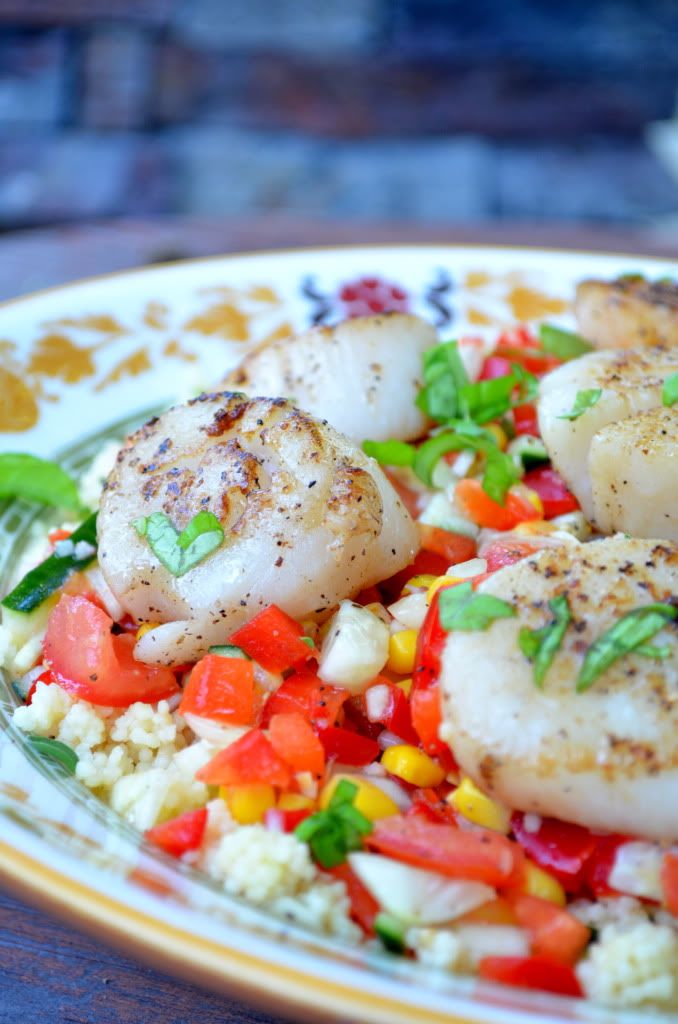
Season the scallops with salt and pepper lightly on both sides and pan fry until cooked. 

Layer first the quinoa, then the vegetable mixture, and lastly the seared scallops in a large serving bowl.

Enjoy :).

The final product is absolutely delicious, not to mention healthy, and makes an excellent main course. I definitely will keep this recipe saved and to try more of Ebby’s delectable eats! 

Royal Icing Covered Sugar Cookies


I’ve wanted to try my hand out at sugar cookie decorating for a while now, especially after seeing some of the truly amazing art done by various bloggers. These ladies are really masters at their craft, and should get some sort of award. Since I had recently gotten some new piping bags and squeeze bottles, I decided to give it a try.
At first I was slightly intimidated by the fact that I would have to make my own frosting. For some reason, I have never been able to get my usual butter cream icing right. Ever. I have a favorite recipe for a walnut-pecan espresso cake that I make a frosting for, and though it’s delicious, my frosting always chooses to remain a jerk and have a slightly grainy look. While it tastes great, and I’m probably the only one to notice the graininess, I always feel overwhelmingly frustrated by my constant failure as a frosting chef, even while following a recipe exactly. However, I found that I have much different luck with royal icing, and that my first attempt came out perfectly.
The decorating is great fun, once all the icing and cookies are laid out, and even my sister joined in to help me decorate a couple!
Have I mentioned I have a slight obsession with giraffes?
Though, I have to admit, cleaning out the piping bags (I hate to waste even the disposable ones) is a pain in the butt. I think if I ever won the lottery, the first thing I would do would be to hire a personal piping-bag washer, or ten, to clean off all that sticky icing. Life would be good.

While my first ones didn’t turn out that well, it was a start, and I’m excited to keep on decorating in the future. J

Thursday, September 8, 2011

Devil’s Food Cake with Espresso Buttercream Frosting and Chocolate Meringue Logs


Wasn't that a mouthful of a title to say? Well, believe me, this cake deserves every letter.
If I could, I would date it. It's perfect.
When you first make it, you're sure to get a bunch of compliments, because it finishes beautifully. And, let me tell you, when you bite into this cake, you will not be disappointed. It's mouthwatering-ly rich and chocolate-y, and the espresso buttercream accompanies the sweetness perfectly. The meringue logs give a burst of chocolate flavor and come out slightly chewy, yet half dissolve in your mouth.

Please try it. I know your waistline might protest, but trust me, it's worth it!

Ingredients:

Devil’s Food Cake:
Tartine by Elisabeth Prueitt

1 ¾ cup all-purpose flour
4 ½ tbsp cornstarch
1 tsp baking powder
½ tsp baking soda
1 ¼ cup cocoa powder
1 tsp salt
1 cup unsalted butter, at room temperature
2 ¾ cup sugar
5 large egg
1 ¼ cup buttermilk

Chocolate Meringue Logs:
Baking by James Peterson
½ cup unsweetened cocoa powder
½ cup confectioner’s sugar
6 egg whites
pinch of cream of tartar
½ cup sugar

Espresso Buttercream
2 cups sugar
8 egg yolks
2/3 cup water
1 1/4 pounds cold butter, cut into cubes
10 tsp espresso, or more to taste


Devil’s Food Cake
Preheat oven to 350 degrees F.

Spray two 9-inch round pans with cooking spray and line the bottom with parchment paper.

Sift the flour, cornstarch, baking powder, baking soda, cocoa powder, and salt together in a mixing bowl. In a bowl in a stand mixer, beat the butter until light and fluffy. Add in the eggs one at a time, making sure to fully incorporate each one. Scrape down the sides of the bowl, and mix fully. On low speed, add the flour mixture in 3 batches, alternating with the buttermilk in 2 batches, starting and finishing with the flour mixture.

Divide the batter into the two cake pans and bake for about 45 minutes, or until a toothpick comes out cleanly. Let cool completely on a wire rack.

Chocolate Meringue Logs
To make the meringue logs, reduce the temperature of the oven to 300 degrees F.

Whisk together the cocoa powder and powdered sugar.

In another bowl connected to a stand mixer, beat together the egg white and cream of tartar on medium-high until stiff peaks form. Add in the granulated sugar and beat for another minute. Sift and fold the powdered sugar mixture over the egg whites.

Fill a piping bag with the meringue and pipe long strips on a baking pan covered with parchment paper.

Bake for one hour or until dry to the touch.

Espresso Buttercream
To make the espresso buttercream, bring the sugar and water to a simmer over medium heat. While the syrup cooks, beat the egg yolks in an electric mixer on high speed for 8 minutes, or until the eggs have quadrupled in size. Check to see if the sugar mixture is ready by taking a bowl of ice water and ladling a little of the sugar water in. Once in, roll the sugar between your fingers. If it forms a soft ball, it’s ready. If it forms thin thread, keep the mixture simmering.

Once ready, turn the mixer to high and slowly beat in the sugar water into the beaten yolks, taking care to not allow the sugar water to touch the mixer’s whisk. Continue beating until the frosting reaches room temperature.

Turn the speed down to medium and add in the butter a little at a time. Beat for 10 more minutes, or until light and fluffy.

Add in the espresso and beat until incorporated.

Assembling
When the cake has cooled, take one layer and cover the top with frosting, sandwiching it with the other layer. Frost lightly with a crumb coat and refrigerate until the frosting has set.

When set, use ½ of the remaining frosting to frost the sides and top of the cake.

Cut the meringue logs to reach a little over the height of the cake, and press into the frosting. Take a piping bag and fill it with the remaining frosting. Use a 1M tip to make rose rosettes to cover the top of the cake.